A discussion on Lights and Natural Lighting Phenomenon.

I bought my Sony Xperia P recently and was fascinated with the camera quality of the device (thank you Sony for creating such a superb camera and for your WhiteMagic Technology). The camera pulled my attention towards “Photography” and made me do research, a lot of research, trust me! 

It is from my research and experiments that today I can talk about “Natural Lighting” and can use the phenomenons in 3D renders. 

“Natural Lighting” is the best tutor for any one who aspires to be a lighting artist because you can see nature everywhere. Look out of your window and you will see the dance between lights and shadows, look inside your house and you will find spots which are perfectly lit and spots which are perfectly “non-lit”. Look up to the sky and you will understand how clouds can change the light or what is the color of the sun. 

Observing the nature is really important, and in fact the key to be a successful Lighting Artist, because nature can’t charge you for what it may teach you. 

Anyway, the main reason for me writing this blog is to tell you guys about the lighting phenomenons and what you should keep in mind while working with lights in your 3D software. 

There is a very fine line between something being amazingly realistic render and something being amazingly awesome render (but not realistic) and the fine line is defined by the light and shadows. While working with lights or say it other wise, while lighting, we all forget one very simple thing, which is, what is the source type of our light. What do I mean by source type? you may ask. Source type is the parameter which defines what kind of light would be there in our final render and what kind of shadows, saturation and contrast would it create.

In nature there is only 2 types of lighting technique, as we may call it. Namely Direct Light and Indirect Light. We are gonna focus on the Direct Light. We can subdivide Direct Light in two different categories, namely Sun Light and Sky Light or Ambient Light.

Sun Light : This phenomenon of natural lighting also known as hard light is fairly simple, it follows 3 things, cast a yellow light (sun’s color), cast strong/sharp shadows and enrich the world with amazingly good colors or bring out the life by enhancing colors. For example, look at this image, it has the sun light being cast on the subject and a very deep dark, sharp shadow is being cast, plus all the colors and details are enhanced due to the sunlight…

Image

 Somewhat similar should happen in your interior renders if you are using sunlight as your main lighting source for direct light. With sunlight in play, your interior should look some what like this…

Image

see the color of light falling on those chairs, on the ground and all over the room, that’s sunlight people, that’s the correct approach. Imagine now, if you use a white light or a HDRI and replace the sunlight, how would the interior look? No doubt it will still look amazingly awesome, but it wont and it can never look amazingly realistic. This is one thing to keep in mind!

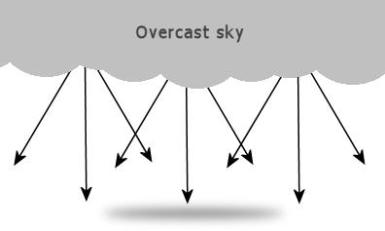
Sky/Ambient Light : Ever wandered in your lawn during winter or rainy season? What type of light do you find? What type of shadows do you see? The light and shadow you see during those days are is the second style in which our mother nature illuminates the world. When sunlight is blocked by clouds, it gets diffused and split and filtered and is cast in a very subtle white color, remember this time the color is “White” not “Yellow”. Look at this image…

Image


This is how ambient light is cast. look at the type of shadow it makes, these shadows are so soft that sometime you can’t even observe them, the overall saturation of your surroundings gets low, the sharpness is lost, the details are lost, only because the light we receive is filtered by the clouds. Take a look for yourself, how things look under an overcast sky…

Image


Image


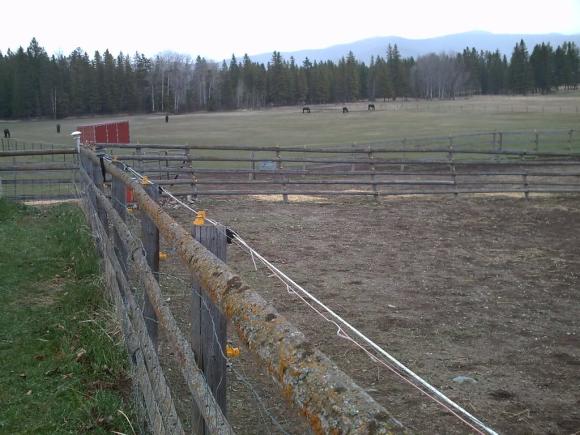
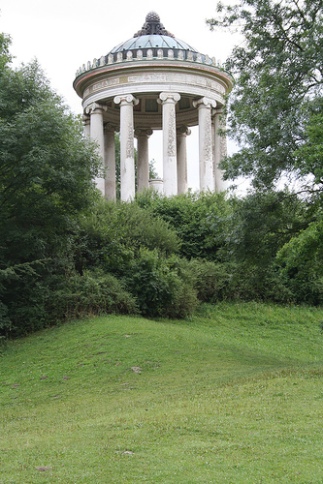
Even when the lighting conditions are little better, we don’t get enough strong light to cast a good shadow…

Image


(None of the above photographs are my clicks, and I do not hold any copyright)

Thus we see how Sun and Sky play a key role in the process of “Lighting” the surrounding. If we keep these things in mind, we can play with our shadow parameters and light’s color to create an amazingly realistic image, and not just amazingly awesome images! 


I hope that I may have been of some help to you people out there! Please feel free to contact me for any tips on lighting on sam2maddy2001@gmail.com or http://www.facebook.com/tanay.pathak


Floor Generator Script

Hi friends, It’s been a while. Well, as you know, I was BUSY XD

Today, I want to talk about a very useful, free to download, script known as “Floor Generator”. This script is distributed by CGSource, you can find the script here “free to download” : http://www.cg-source.com/floorgenerator.php … Go for it, download and then follow the tutorial for some basic information and how to use it, though you can find a few video tutorial on their website, but I wanna to share something different.

I was working on a personal Arch-Viz when I suddenly did this. Please read along to understand better.

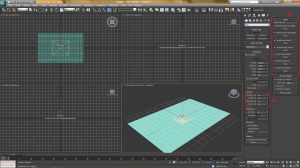
For generating wooden floors and tiles, use the “Floor Generator” script. To use it, you first have to create the shape where you want the floor to be made, in other words, “Floor Generator” works with “Shapes”. For this tutorial i’ll make a simple square shape like this

Image

I have made a 16″x16″ square. After this simply run the floor generator script like this

Image

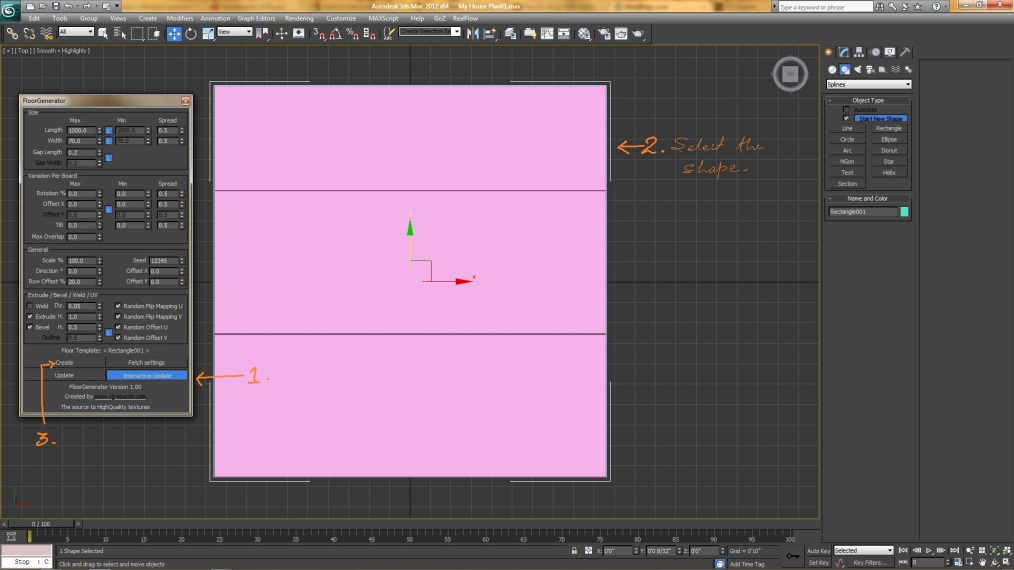
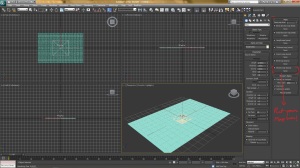
Then you have to click on “Interactive Update” so that the thing updates as we go along with changing the settings, and then click on the shape you have created and hit “Create”

Image

Now change the “Length” and “Width” to your accord, and do some other settings, you can find them in the video available on their website. Make your floor 🙂

Well, this was the basic, what I wanted to show is a little different. Imagine if your floor had some opening, say a circular hole for something to pass through it? Floor Generator will help you make floors like that too. Suppose my floor was something like this…

Image

“Floor Generator” will only create floor on the areas inside the square, because I have attached all those shapes to the main square shape and like the native max’s extrude function, the “Floor Generator” will read those extra shapes to be holes or boundaries. Like this…

Image

This is what I wanted to share with you all today, “Floor Generator” is an easy to use script, and the best part is, it’s free to download. Please use this script and make your renders more realistic with awesome floors.

Hope you all find this tuto informative enough to start creating your own floors 😀

For any other suggestions, please leave a comment below or send me an email at: “sam2maddy2001@gmail.com”

Happy Rendering!

Curtain Material

Hello Friends, 

I was asked by a few members from “cgarchitect” to post a tutorial on my curtain material I used in the “Studio House” scene. Here it is. I hope it will be of help to most of you.


I wanted to make a translucent curtain material and I was looking at the net for some tutorials when I came across “Pixela”‘s curtain material tutorial on Ronen Bekerman’s website. I looked at it, read it 4 times and finally decided to not use that tutorial, for that was not the look I wanted. But I did took one thing from it, it is the use of VRay 2Sided Material and the use of “Fall Off” maps.

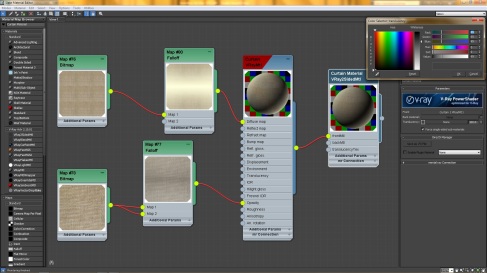
Below are the images of my material nodes, please have a look at them. That’s all I can add in for this small tutorial. 


1.) The “Diffuse” part : I used a tint of yellow for that falloff look to match with the texture.

Image


2.) The “Opacity” part : I used maps with the 50% of both the slots of Fall Off map. Also I put the shades of Gray in their color slots and controlled how the colors would interact through the falloff curve.

Image

3.) The “VRay 2Sided Material” part : I used the “VRay Material” which had Opacity map on the front material of “VRay 2Sided Material” and a dark “Gray (RGB = 68)” as the translucency color.

Image


This is all I did, there is nothing big and nothing small for this material, my friends, its all about the fall off and the translucency. 


Regards!

Tanay Pathak

Bitmaps In VRay

Hello friends,

This post if for discussing the problems we face if we import downloaded materials in VRay. Sometimes (most of the times) the materials does not look/behave the same as they should. I faced these kinds of problems a lot of times and I think this is a good topic to talk about.

Here is what I think :

Basically, these types of materials depend on the bitmaps for a lot of their realism, like the surface properties (bump, reflection glossiness, amount of reflection). When we try to import some material in the library of max, usually max looks up for the actual path of the bitmaps, place where the bitmap was originally stored, during the creation process. Since our PC does not have those special names of the directories, max can not find bitmaps, for example, I create a material and I have all of my bitmaps stored in C:\Users\SomeName\Documents\Textures, my max will register this path as the first priority to look for, even if I export my material as a .mat file. Now, when someone else downloads my material from internet, their PC will look for the path which has been assigned for the bitmaps previously, but it will not be able to find it. This will create a mess and the materials will not work as they should.

To solve this problem, the only way is to reload the bitmaps. You said you have problems loading regular .jpeg files, as you are still learning. It is very simple, you just open your material browser, in that, when you select your VRay Mtl, next to your diffuse color, there is a small box, click on that, it will ask what type of file you want to place, you click on Bitmap (can include .jpeg, .png, .psd and other image files), then search for the bitmap you want to use, in your case, the place where you might have downloaded your material, they would have provided the bitmaps with it. Search the desired bitmap and viola.

The moment you do this, you will see a “M” in place of that box, it means that channel is influenced by some kind of map (in our case, bitmap). Similar “M” will be there in reflect, reflect glossiness or any other area. Click on those “M” and in the new tab, you will find a source, pretty much similar to the “path” I have been talking about, look for the last “\” and the name after that, that name is the bitmap you are looking for (I hope I am not making you feel bad by so much explanation).

Apart from these small boxes, there is a “Maps” section in every Shader, be it VRay, Mental Ray or Standard Scanline. Those “Maps” are different channels which effect and control the properties of materials, you need to explore your downloaded material before you proceed with the application. Please find all the maps that are missing or those which your PC can not locate because of wrong path and replace them with whatever you feel like.

I hope my explanation comes in handy to you and to any other who might find this problem a headache.

Please feel free to drop by an e-mail if need arrives at : sam2maddy2001@gmail.com
or you can visit my facebook page : https://www.facebook.com/vraypage

—-
Happy Rendering!
Regards!
Tanay Pathak

Controlling Floor Reflections!

Hi Friends,

Through this tutorial (step-by-step), I would try to explain an easy process to create realistic (photorealistic) floor reflections. My main focus would be on the wooden floors. I will try to make things as simple as they can.

Before I start with the tutorial, I would like to talk about reflection. As you all already know, reflection is the physical property of a material which determines the amount of light it will absorb and the amount it will bounce back. So let’s look at the process of creating and controlling reflections on materials in V-Ray.

For the sake of organization I have prepared this scene with no objects or background in it. A simple scene with wooden floors, no reflections on the floor either. We will add reflection to the floor as we proceed.

Floor with no reflections.

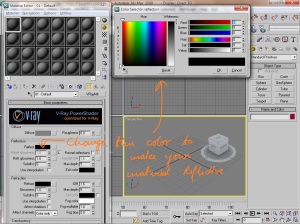
Now we will add some reflection on the floor, a very faint, normal, overall reflection, controlled by the Reflection parameter of the floor material. I have set the “Reflect” to a very dark gray, the Highlight glossiness to 0.8 and the subdivs to 25…

Basic Reflection

At this point, we can move ahead and add objects to the scene, tweak the reflection parameters a little and give it a final render. But, I want the reflection to be mapped, I want certain parts of the floor to reflect, parts which do not contain any deformation should reflect and the grooves and surface deformations should not reflect… How would I achieve that effect? Simple, by putting a reflection map in the reflect channel. Reflection map is nothing but a level corrected bump map… For my scene, it looks like this

Reflection Map (Color Corrected inside 3ds Max)

Now that we have our reflection map set up, let’s see how the render changes…

Reflections controlled by Reflection Map

The reflections we achieved using the technique discussed above is the most realistic approach, these kind of reflections are what we see on wooden floors which are old. This process not only creates good reflections but also reduces render time as the texture has certain parts reflecting and certain parts not reflecting.

I tried to share with you a very basic approach for creating good reflections, now it depends on your research and tweaks how you create stunning images following the rules discussed above. That’s all for this tutorial, please feel free to share your views in the comment section…

Stay Blessed! Happy Rendering!

Regards!

Tanay Pathak


What do you want to know?

Friends, please tell me what tutorials do you want, anything that is related to V-Ray (Lighting, Setting up Materials, Render Optimization, Noise Reduction, etc., etc..). Please comment below and let me know, it will help me understand better… 🙂

Stay Blessed! Happy Rendering!

Regards

Tanay Pathak

V-Ray Fur! How to use it?

Hello my friends, after a long pause I am back with a new step-by-step on V-Ray Fur. Lately I have been asked by a few net friends to make a tutorial on “How to use V-Ray Fur for carpets” and I was moved by the requests, so here I am… Let’s do it!

First of all, I want to point out the areas where V-Ray Fur can be used. Be it a Sofa-Set, Cushion, Carpet, Huge grass fields, Towels, Bathroom Slippers, Fur Jackets, Animal Fur, anything which might have any “Strand” can use V-Ray Fur. But the question is, how are we supposed to use it? I’ll tell you how…


Start up you 3ds Max and open a fresh scene…

Before we start using V-Ray Fur, I recommend we set our units to Meters, we will change the units to some other convention later as we proceed.


Now make a plane of 1 meter by 1.5 meter and increase the segments to 45 and 30


Now, time to make apply V-Ray Fur.

Click on the create panel and from the drop down menu select V-Ray.


Then click on V-Ray Fur, and your scene would change like this (don’t panic at this point).


And now starts the fun part, the parameter changing… At this point of time, you can always revert back to start, and make a new scene, remember we are working on a plane not on a box, we are not giving it any thickness, but we need thickness in our carpet. You can do this by adding a shell modifier, then converting the plane to editable poly, then select all the polys except the bottom ones, detach the selected polys and you have an area where you can apply V-Ray Fur (with thickness).


Anyway! Now, have a look at the parameters, see what all tabs it has, what all settings can be made here in the V-Ray Fur Parameters. Also, at this point of time, I would recommend you change your units from “meters” to “millimeters” as we need more control on the strands of our Fur.

Once you are satisfied with your units, and have gone through the parameters (with questions in your mind about what changes what), start tweaking your Fur…


First thing now we need to change is the Length. This determines how long our strands would go. Usually in real life, the strands in the carpets are very small, and they have that velvet feel. To achieve this, we will decrease our length to about 10 – 12 mm.


After this comes the “Thickness”. How thick you want your threads to be? It really depends on the object we are creating. For this carpet here, I have put the thickness to about 2.5 mm.

The “Gravity” parameter, as the name suggests, it deals with the effect of gravity on your strands, I usually put it to “Zero” because I change the “Bend” Parameter.

“Bend” parameter is used to give the strands a bend (it is similar to the gravity param). For my carpet, I have put the bend to 3.5 mm.

This is the most important parameter, Taper. As we know, grass and carpet strands (hair too) are thick at the root and thin as it goes up to the tip. In V-Ray Fur, Taper deals with this attribute. A value of  “Zero” would mean the root and the tip has the same thickness, as we increase the value, the tip gets thinner as compared to the root. For this carpet, I have used a value of 0.8.


We will leave all the other parameters (would not change any). But i’ll explain all of them.

By now, our carpet has been created ( had we been making a grass field, it would also have been created by now). But there are a few parameters left to check.

One of them is the Distribution Parameter. I have never worked on the “per area” thing and have always used the “per face”. Lately I found out, if we have a lot of segments (faces), the value needed to be put in the input box next to “per face” is very low. For my carpet, I have used a value of 80. But, if we have less faces, we need to put high values ranging between 200-500. I would not recommend going above this if you do not have a good PC because while rendering, V-Ray will take a lot of time calculating the geometry.


The, Density var, Thickness var, Length var and Gravity var gives randomness to the strands, but it can also be controlled by maps, which are on the other panel of the V-Ray Fur Parameters.


The one thing which I am always interested in while creating carpets or grass fields is the density, I control it through the “Density Map”. It’s very simple, all you need to do is to create a black and white patchy map, or something as we use for displacement map or specular, reflection, bump maps and put it in the “Density Map” where its written “None”


That’s all about the carpet creation. Now comes the texture.


Texturing the carpets created using V-Ray Fur are as simple as 1-2-3 and done…

As you must have seen, carpets in real life have strands of the same color as the texture itself, this is the same with V-Ray Fur (for carpet and grass creation). You need to put a UVW Map on the source plane, then put your desired texture on that plane and the same texture on the V-Ray Fur (select V-Ray Fur and apply the texture). V-Ray is intelligent enough to gather the information from its source object and set the texture on the fur accordingly. That’s about it!


I can guarantee you will create good carpets with awesome textures if you keep the above things in mind. But I strongly recommend you do more research and find out your own ways to tweak the settings. I have not shown the process to create grass because it is exactly the same as above, just a little tweak in the length and thickness of the strands, which I leave up to you to discover.

One thing about the materials, you can put all types of materials on your V-Ray Fur (whatever vray allows). For grass you might need a translucent, specular grass material (which you will have to make) and you can put it on the V-Ray Fur. Plus, you are not bound to use the same maps on the source plane and the V-Ray Fur, you can always experiment with different maps.


That’s all I have to share with you all this time. I hope you do more R ‘n’ D, and my small tutorial comes in handy at times…

And here is the render of the carpet I made using the same techniques as described above (even the params are same)…


Thank you all for visiting my blog.


Regards

Tanay Pathak


Intermediate VRay 1.a. Materials

Hello, Tanay here,

In the last section, I told you about the basics of VRay, it’s time to take our first leap towards “Advanced”. This series of tutorial is named as the Intermediate Series and we will talk about Materials, Lights and Render Setup, of VRay.


I will start with a small comparison between the Standard Material and the VRay Material also known as VRayMtl…

There is a lot of difference between the Standard Material and the VRayMtl. In the Standard Material, there are 3 color sections, namely, Ambient, Diffuse and the Specular.  The specularity of  standard material is controlled by the Specular Level and the glossiness is controlled by the Glossiness. In the VRayMtl, there is only one main color slot named as Diffuse. Glossiness is controlled by the Highlight Glossiness (which is locked by default) and the Specularity is controlled by Reft. glossiness (which is unlocked).


Now, let’s talk about the VRayMtl…

To switch to VRayMtl, its needed that you change your renderer to VRay. How to do this has been explained in the Basic Series. Once you have switched to VRay renderer, you can open the Material Editor and change from Standard material to VRayMtl…

As soon as you switch to VRayMtl, your Material Editor will change into something like this…

VRayMtl is the most powerful shader available in VRay, you can create any material with this. I will brief out the basics of each options available in VRayMtl below…

Diffuse : This controls the color of your material, you can add maps (custom textures) in this.

Reflection

Reflect : This controls the reflection of your material, it has a color value in which you can add any color but black means no reflection and white means full reflection. You can add maps to this section making your material reflect that map or take its value from any alpha.

The above result was achieved by changing the color of the Reflect and the Diffuse has been put to black…

Hilight glossiness : This controls the glossiness of the material. Its locked by default but you can unlock it by clicking the “L” button next to it. Its value ranges from 0.0 to 1.0, if you decrease its value from 1 to 0.9, a little bit of glossiness would be added to your material, as you decrease the value more, it will add more glossiness and increase in size.

Refl. glossiness : This controls the specular value of the material, its value also ranges from 0.0 to 1.0, and the working is same as “Hilight glossiness”. This also controls the “Bluryness” of your material (the lower the value, the more blur it adds).

Subdivs : As we increase the blur effect of our material, it gets distorted and noisy, to decrease that noise we need to increase the “Subdivs” value. However, it takes the render time as its food :D…

Above image has Reflect : 128 (50%), Hilight glossiness : 0.57. Refl. Glossiness : 0.75 and Subdivs : 25…

Fresnel Reflection : It is locked by default, you need to check it to activate its parameters. This type of reflection depends on the angle of camera from the object, if the angle increases, so does the reflection, like it happens with “Mirage”. Once activated, you can put in the IOR value (Index of Reflection).

Max depth : the number of times a ray can be reflected. Scenes with lots of reflective and refractive surfaces may require higher values to look right.

Exit color : if a ray has reached its maximum reflection depth, this color will be returned without tracing the ray further.

Use interpolation : V-Ray can use a caching scheme similar to the irradiance map to speed up rendering of glossy reflections. Check this option to turn caching on…

If you compare this image with the similar image above, you will find there is a “Big” difference between the render time.

Refraction 

Refract – refraction color. Note that the actual refraction color depends on the reflection color as well. See theEnergy preservation parameter below.

Refraction settings for the above images…

IOR – index of refraction for the material, which describes the way light bends when crossing the material surface. A value of 1.0 means the light will not change direction.

Glossiness – controls the sharpness of refractions. A value of 1.0 means perfect glass-like refraction; lower values produce blurry or glossy reractions. Use the Subdivs parameter below to control the quality of glossy refractions.

Subdivs – controls the quality of glossy refractions. Lower values will render faster, but the result will be more noisy. Higher values take longer, but produce smoother results. This parameter also controls the quality of the translucent effect, if on.

Use interpolation – V-Ray can use a caching scheme similar to the irradiance map to speed up rendering of glossy refractions and translucency. Check this option to turn caching on.

Max depth – the number of times a ray can be refracted. Scenes with lots of refractive and reflective surfaces may require higher values to look right.

Exit color – if this is on, and a ray has reached the maximum refraction depth, the ray will be terminated and the exit color returned. When this is off, the ray will not be refracted, but will be continued without changes.

Fog color – the attenuation of light as it passes through the material. This option allows to simulate the fact that thick objects look less transparent than thin objects. Note that the effect of the fog color depends on the absolute size of the objects and is therefore scene-dependent. The fog color also determines the look of the object when using translucency.

Fog multiplier – the strength of the fog effect. Smaller values reduce the effect of the fog, making the material more transparent. Larger values increase the fog effect, making the material more opaque. In more precise terms, this is the inverse of the distance at which a ray inside the object is attenuated with am amount equal to the Fog color.

Fog bias – this parameter allows to change the way the fog color is applied; by adjusting this parameter you can make thin parts of the object to appear more transparent than normal, or less transparent than normal.

Affect shadows – this will cause the material to cast transparent shadows, depending on the refraction color and the fog color. This only works with V-Ray shadows and lights.

Notes

  • Use the VRayMtl whenever possible in your scenes. This material is specifically optimized for V-Ray and often GI and lighting is computed much faster for V-Ray materials than for standard 3ds Max materials. Many V-Ray features are guaranteed to work properly only with VRayMtl and other V-Ray compliant materials.
  • VRayMtl can produce reflections/refractions for matte objects.

This concludes the tutorial on VRayMtl or the VRay Material. Keep a check on the upcoming tutorial named “Intermediate VRay 1.b. Materials”


Basic VRay 2. An Overview

In this tutorial, I will talk about VRay. Mainly dealing
with question like
a.) What is VRay?
b.) What changes, when we switch to VRay Renderer?

An "In Depth" answer to all the above questions are given below.
 
A.) What is VRay?
VRay is a Rendering Engine created by Chaos Group, in order to achieve 
realistic renders for CG movies, Advertisements, and games (VRay has
been used in BLUR Studio's game Fire Fall). It is one of the most powerful
rendering engine in the market.

B.) What changes, when we switch to VRay Renderer?
Topic related to "How to switch to VRay Renderer" has been discussed in
my last post. Now I will tell you about the changes VRay Renderer brings
with it in 3Ds Max...

B.a) First change you will notice as soon as you change to VRay Renderer
is the Render Setup dialogue box itself...

This dialogue box contains 5 tabs namely Common, V-Ray, Indirect Illumination,
Settings and Render Elements. I will talk about them in "Intermediate"
tutorials.

B.b) After a switch to VRay Renderer, you are not restricted to use any
particular type of geometry or shape, you can use any shape and geometry
for your models along with any type of modeling process. The only restriction
is the use of Materials and Lights. You can use all the Standard Materials
and VRay Materials and the same goes with Lights, how ever, VRay won't allow
you to use any thing related to Mental Ray.

The materials of VRay are...

 
B.c) In the Lights, VRay does not brings any change, only it enables the
user to use its light system, which contains of VRay Light, VRay IES,
VRay Ambient Light and VRay Sun. A deep tutorial about every light system
will be posted later under the topic "VRay Lights"...

Restrictions of VRay and What VRay does not like...
To be frank with you, VRay does not like Mental Ray at all, which means
you can not use anything that is related to Mental Ray, in Vray, be it
lights or materials. If you somehow do try to use Mental Ray powered or
supported materials and lights, VRay will show errors. You can not use
Photometric Lights, "mr" Materials and Raytrace material. The basic error
VRay shows if you use Mental Ray's plugins is...

And the scene might render "BLACK"

This sums up the "Basic VRay" topic of this tutorial series. Please look
forward to the upcoming "Intermediate" section, which will contain
"Intermediate VRay 1. Materials"
"Intermediate VRay 2. Lighting"
"Intermediate VRay 3. Render Setup"

Basic VRay 1. Getting Started

I have seen and read a lot of tutorials on VRay in these past 2 years. Now, I am going to create a series of tutorials on VRay starting from the basics, going up to the advanced part of it. I hope you all will enjoy!.

.

Basic VRay is about getting to know VRay as a starter (beginner).

So here it is…

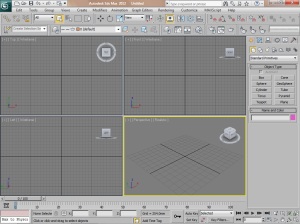
1.) Open 3Ds Max. It should look like this…

3Ds Mas Screen

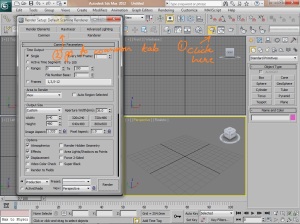
2.) Once the scene is open, we need to change our Renderer.

Then…

After this, your screen should look like this…

This sums up the first tutorial of Basic Vray 1. Getting Started. Please keep a watch for the next tutorial.